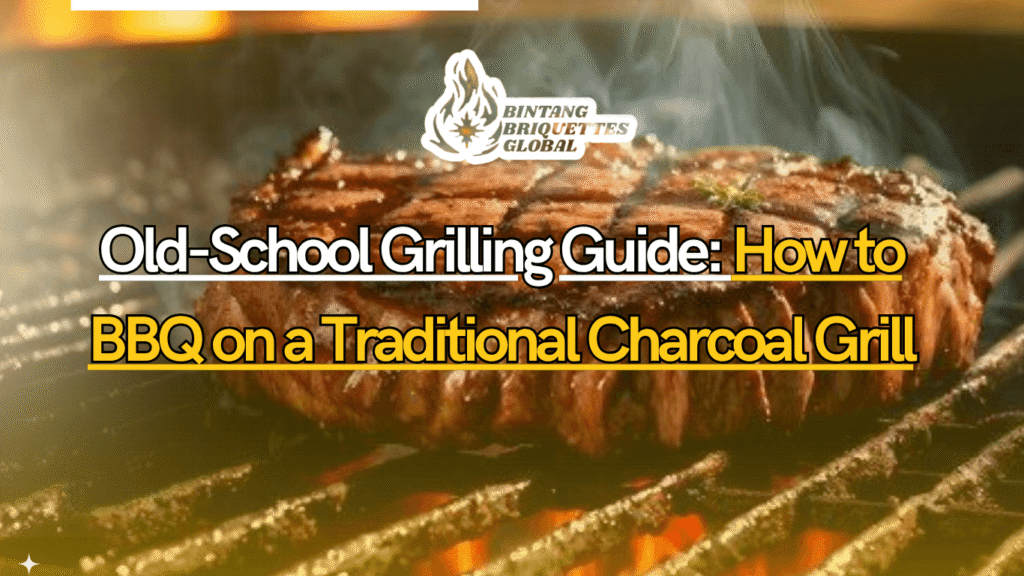
1. The Charcoal Legacy: A Flame That Never Died
bintangbriquettes.com – Before fancy grills with temperature dials and digital thermometers, before gas igniters and push-button flames—there was charcoal. Fire, wood, smoke, and instinct. That’s how the first BBQs were born. And that’s exactly what you tap into when you learn how to BBQ on a traditional charcoal grill.
🔥 A Tradition as Old as Fire Itself
Charcoal grilling is not just a cooking method—it’s a cultural legacy. Across the world, ancient communities used glowing embers to slow-roast meats, toast flatbreads, and smoke fish. This primal method evolved, but never disappeared.
Whether it’s satay grilled over coconut shell embers in Indonesia, yakitori skewered over binchotan in Japan, or brisket smoked low and slow in Texas pits, one truth remains: charcoal gives food soul.
And you? When you fire up your own traditional charcoal grill, you become part of that lineage.
🪵 The Romance of Real Fire
There’s something deeply satisfying about creating fire with your own hands. The whoosh of flames catching on paper, the crackle of hardwood igniting, the glow that spreads through stacked coals—no gas knob can replace that.
Charcoal grilling isn’t about convenience. It’s about presence.
It demands your attention. It teaches patience.
And the reward? A seared steak with smoky crust, chicken infused with aroma, corn blistered to sweet perfection.
This is the kind of flavor only fire can give. And it’s why learning how to BBQ on a traditional charcoal grill is worth every spark, smoke, and smudge.
👨🍳 Your First Step Into the Flame
If this is your first time, welcome. not just learning to grill—you’re learning a skill passed down through generations. trading buttons and switches for coal and breath. the old-school way, the honest way, the delicious way.
And don’t worry—this guide will walk with you through every step. From choosing the right grill and lighting your first fire, to managing heat like a seasoned pitmaster and serving meals that impress.
So roll up your sleeves. Grab some charcoal. It’s time to master the flame the way our grandfathers did.
Because how to BBQ on a traditional charcoal grill isn’t just a question—it’s a lifestyle waiting to be lived.
2. Why Choose Old-School? The True Value Behind Traditional Grilling
In a world where everything is instant, smart, and high-tech, it might seem odd to stand beside a grill, fanning flames, adjusting vents by hand, and waiting patiently for coals to glow. But those who’ve truly embraced how to BBQ on a traditional charcoal grill will tell you—there’s nothing like it.
🔥 It’s About Control—Not Convenience
Gas grills might give you speed, but they take away the soul. Charcoal grilling, especially the old-fashioned way, gives you something better: connection. You feel the fire. You manage the heat. You’re not just watching food cook—you’re guiding it.
- You learn when the fire is too hot
- You move food between heat zones
- You build your sense of timing, instinct, and skill
Cooking becomes active, not passive. And that’s where the joy lies.
🌡️ It Trains Your Intuition
Modern grilling often relies on dials and thermometers. But with a traditional charcoal grill, you start learning from feel, sound, and smell:
- The color of the coals
- The sound of meat sizzling
- The aroma of smoke hitting fat
This kind of intuitive cooking can’t be taught by machines—it comes from doing. And nothing teaches better than learning how to BBQ on a traditional charcoal grill by feel.
🪵 The Flavor Can’t Be Beat
Charcoal isn’t just heat—it’s flavor. That deep, smoky, slightly charred essence you taste in perfectly grilled meat? You won’t get that from gas or electric. It’s created by:
- The combustion of natural materials (wood or coconut shell charcoal)
- Fat dripping onto coals, creating aromatic smoke
- Caramelization from high, direct heat
This authentic BBQ flavor is what makes people stop mid-bite and say, “Wow—this tastes amazing.”
🧘 The Ritual Is Therapeutic
There’s something calming about tending a fire. No screens. No beeping timers. Just you, the open air, and the sound of burning charcoal. In a world full of noise and distraction, charcoal grilling is pure therapy.
For many, learning how to BBQ on a traditional charcoal grill becomes more than just a skill—it becomes a ritual. A way to unwind, reconnect with nature, and create meaningful moments with food.
👨👩👧👦 It Builds Stronger Bonds
Old-school grilling has a way of bringing people together. When you fire up a traditional charcoal grill:
- Neighbors lean over the fence
- Friends gather around, drink in hand
- Kids watch curiously, waiting for that first bite
Charcoal BBQ isn’t just about what’s on the grill—it’s about what happens around it. Laughter, stories, memories.
💥 Final Thought
When you choose old-school grilling, you choose something real.
skill over shortcuts.
flavor over convenience.
a tradition that lives through fire, smoke, and time.
That’s the value behind traditional BBQ.
That’s why learning how to BBQ on a traditional charcoal grill is more than worth it.
3. Meet the Traditional Charcoal Grill: Anatomy and Soul
You can’t truly master how to BBQ on a traditional charcoal grill without first understanding the tool itself. This isn’t just a cooking device—it’s your forge, your fire temple, your BBQ battlefield. And like any weapon, you must know its parts, its quirks, and its strengths.
Let’s break down what makes a traditional charcoal grill unique—and why it still holds its ground in the modern age.
🔲 The Core Design: Simplicity with Purpose
At first glance, a traditional charcoal grill looks basic: a round or rectangular metal box, a grate, and a lid. But within that simplicity lies unmatched function. Here’s what you’ll typically find:
- Fire Bowl (Base): Where the charcoal lives and burns. Often made from cast iron, steel, or porcelain-coated metal.
- Charcoal Grate: Sits at the bottom, keeping charcoal elevated so ash can fall through.
- Cooking Grate: The upper grid that holds your food—usually stainless steel or cast iron.
- Vents (Dampers): Small but mighty. Control airflow to regulate heat. Usually one below (intake) and one above (exhaust).
- Lid: Essential for heat retention and smoking. A key difference from open-flame cooking.
- Ash Catcher or Tray: For collecting spent ashes and easing cleanup.
Each component serves a strategic role in controlling heat, airflow, and flavor. Once you understand them, you begin to feel like the grill isn’t just hardware—it’s an extension of your will.
🍖 Kettle vs. Barrel vs. Drum: Know Your Shapes
Traditional charcoal grills come in a few iconic styles. Each has its own strengths—and knowing which one suits your style helps you better learn how to BBQ on a traditional charcoal grill.
1. Kettle Grill
- Classic, round, dome-lidded shape
- Excellent for heat circulation
- Great for two-zone setups
- Easy to control with just two vents
✅ Ideal for beginners
2. Barrel Grill
- Horizontal, drum-like body (resembling oil barrels)
- More space for indirect cooking and smoking
- Often comes with a side firebox
✅ Perfect for ribs, briskets, or long cookouts
3. Drum or DIY Grill
- Often made from modified metal drums
- Bigger, hotter, less refined—but very powerful
✅ For those who love hands-on control and experimentation
🌬️ The Soul of the Grill: Airflow = Everything
In charcoal grilling, you don’t control heat with buttons—you control air.
Air feeds fire. Fire feeds heat. That’s why vents (also called dampers) are your best friend.
- Open the bottom vent to let in more oxygen = hotter fire
- Open or close the top vent to retain or release heat and smoke
- Mastering vent control is mastering temperature
Think of it like this: your grill breathes. You’re just learning how to control its breathing.
🔥 No Frills, Just Fire
Traditional charcoal grills don’t babysit you. digital readouts. auto-temp controllers. grill assist modes. Just you, your fire, and your instinct.
This is why mastering how to BBQ on a traditional charcoal grill creates real grillers. It strips away the automation and forces you to focus on:
- Fire building
- Heat control
- Time, texture, and smell
- Feeling when something’s just right
🧠 Respect the Tool
It might not look high-tech. It might even be a little rusty. But don’t be fooled: a traditional charcoal grill is a powerful, versatile tool. In the right hands, it can create meals that rival Michelin-star kitchens—smokier, juicier, more soulful.
When you understand its anatomy and trust its design, you’re already halfway to becoming a pitmaster.
4. Preparing for Battle: What You’ll Need Before You Light the Fire
Before you even strike a match, there’s one golden rule to remember in how to BBQ on a traditional charcoal grill: preparation is power.
Like a warrior sharpening his blade before battle, a true griller prepares everything in advance—tools, fuel, and mindset. Because once the fire starts, there’s no pause button.
Here’s your essential checklist before the first coal burns.
🔥 1. The Right Charcoal: The Heart of the Fire
Your charcoal is your fuel and your flavor.
Lump Charcoal
- Made from natural hardwood
- Burns hotter and faster
- Ideal for high-heat searing
- Less ash, more smoke flavor
Charcoal Briquettes
- Uniform shape and size
- Burns longer and more steadily
- Great for beginners needing consistency
- Slightly more ash, slower to light
Specialty Charcoal (Coconut Shell, Binchotan)
- Longer burn, minimal smoke or ash
- Ideal for longer cooking or specific regional dishes
- A bit more expensive, but worth it for serious grillers
💡 Pro Tip: For your first try at how to BBQ on a traditional charcoal grill, go with high-quality briquettes for easy control—or blend briquettes and lump for balance.
🧰 2. Must-Have Tools for Every Old-School Griller
You don’t need fancy gadgets. You need reliable tools. Here’s your starter kit:
- Chimney Starter – The best way to light charcoal evenly
- Long-Handled Tongs – For flipping, shifting, and safety
- Grill Brush – To clean grates before and after
- Heat-Resistant Gloves – Protect your hands when moving hot grates or opening the lid
- Meat Thermometer (optional) – For checking doneness, especially with thicker cuts
- Metal Tray or Catch Pan – To hold cooked food or move charcoal safely
💡 Keep everything close. Once the grill is hot, you don’t want to run inside for supplies.
🔥 3. Fire Starting Materials (Skip the Lighter Fluid)
Forget lighter fluid. The flavor it leaves behind isn’t worth it. Instead, go clean and reliable:
- Newspaper or Natural Fire Starters – Crumpled paper under a chimney does the job
- Chimney Starter – Fill it with charcoal, light from underneath, and wait 10–15 minutes
- Tongs or Poker – To arrange hot coals carefully once ready
💡 If you want to learn how to BBQ on a traditional charcoal grill the right way, always avoid chemical starters.
🌬️ 4. Know Your Environment
Your surroundings affect your fire. Before grilling, check:
- Wind Direction – Strong winds? Turn the grill to protect the fire
- Surface Level – Uneven ground can cause wobbling or poor airflow
- Shade or Sunlight – Sun can affect heat, especially on long cooks
- Safety Zone – Keep kids and pets at a safe distance
🧽 5. Pre-Clean the Grill
Charcoal grills carry flavor from one cook to the next—but too much old residue will hurt performance.
- Scrub the grates with a wire brush
- Empty out old ash from the last session
- Check for rust or grease buildup
This step also helps you get to know your grill better, which is a big part of mastering how to BBQ on a traditional charcoal grill.
📦 Bonus: Optional but Awesome Extras
If you want to go the extra mile, consider:
- Grill Basket – For veggies or fragile items like fish
- Water Spray Bottle – For taming flare-ups
- Wood Chips – Add flavor by soaking and tossing them over the coals
- BBQ Apron – Because you’re going to get messy—and look cooler doing it 😎
🧠 Mental Preparation: Be Patient, Be Present
The fire won’t always behave. The heat might take longer than expected. That’s okay. Charcoal grilling is a rhythm, not a race.
When you’re ready—mentally, physically, and with all your tools—that’s when the magic begins.
5. Lighting It Right: How to Start Your Charcoal Fire Like a True Pitmaster
Everything begins with the fire. If you want to learn how to BBQ on a traditional charcoal grill, you must first master the ancient art of lighting charcoal. Do it wrong, and your BBQ will be a frustrating mess of cold spots, unlit coals, or overly smoky flare-ups. Do it right, and your fire becomes the perfect foundation for greatness.
Here’s how the pros—and the old-school grillers—do it.
🔥 Step 1: Skip the Lighter Fluid
Let’s be clear: lighter fluid is the enemy of flavor. It’s fast, yes—but it leaves a chemical taste that ruins the whole point of charcoal grilling.
The old-school way? All-natural ignition. No shortcuts. Just real fire, real control, and no artificial aftertaste.
🏗️ Step 2: Use a Chimney Starter (Highly Recommended)
The chimney starter is your best friend. It’s simple, effective, and gives you perfectly lit coals every time.
Here’s how to do it:
- Fill the chimney with charcoal (¾ full for small cooks, full for big ones)
- Place crumpled newspaper or natural fire starter under the chimney
- Light the newspaper from multiple sides
- Wait 10–15 minutes until the top coals are covered with gray-white ash
- Carefully pour the hot coals into your grill base
✅ This method is reliable, fast, and makes you feel like a pitmaster from the very start.
🔥 Step 3: Lighting Without a Chimney Starter (Old-School Classic)
If you’re committed to the most authentic way of how to BBQ on a traditional charcoal grill, you can build your fire manually.
Here’s how:
- Arrange coals into a pyramid shape in the center of the grill
- Place natural fire starters or paper underneath
- Light from the bottom using a long match or lighter
- Wait 15–20 minutes until most coals are glowing red with a coating of white ash
- Use tongs to spread them into desired zones
💡 Keep your lid open and bottom vent wide during this process to feed the fire with oxygen.
🌬️ Step 4: Manage the Airflow
Air is your temperature dial. Learn this early, and you’ll have full command over your grill.
- More oxygen = hotter fire
- Less oxygen = lower heat
Start with all vents open during lighting. Once coals are ready, you can start adjusting depending on what you’re cooking.
🧱 Step 5: Build Your Heat Zones
Before adding any food, arrange the coals into zones for cooking flexibility:
🔥 Direct Heat Zone
- Place coals directly under the cooking grate
- Ideal for searing, burgers, and thin cuts
🌡️ Indirect Heat Zone
- Leave one side without coals
- Great for chicken, ribs, or anything that needs slow cooking
This setup is key to controlling your cook and avoiding flare-ups—especially when learning how to BBQ on a traditional charcoal grill as a beginner.
⏱️ Step 6: Let the Grill Preheat
After coals are arranged and glowing, place the cooking grate on top and:
- Close the lid
- Let the grill preheat for 5–10 minutes
- Clean the grates with a brush (if needed)
- Oil them lightly to prevent sticking
Now you’re ready to cook like a true charcoal griller.
🔥 What It Should Look Like When It’s Ready
- Coals glowing orange with white ash
- Little or no visible flame
- No black, unlit lumps remaining
- Hot grate (test with hand 4 inches above: 2–4 seconds = high heat)
🧠 Fire Wisdom: What to Do If…
- Coals won’t light? Add more paper or a natural starter. Check airflow.
- Coals die too fast? You may have closed vents too early or used poor-quality fuel.
- Flames are too high? Don’t panic. Close the bottom vent halfway and wait.
- Need more coals later? Light new ones in a chimney while food cooks in the cool zone.
Lighting your fire is not just a technical step—it’s the ritual that begins every great BBQ story. When you light it right, everything else flows naturally.
This is the heartbeat of learning how to BBQ on a traditional charcoal grill.
6. The Dance of Heat: Learning Temperature by Feel, Not by Thermometer
Charcoal grilling is a dance—between fire and food, heat and timing, instinct and control. Unlike gas grills with fixed knobs and LED displays, traditional charcoal grills ask you to feel the flame, to read the coals like an open book. If you want to truly master how to BBQ on a traditional charcoal grill, you must learn this dance.
It starts with understanding heat management—the rhythm of the coals.
🌡️ Why Heat Control Matters
Too hot? You burn the outside and leave the inside raw.
Too cold? You’ll wait for hours and get rubbery meat.
Perfect heat? You get caramelized crusts, smoky layers, juicy centers, and full control of the outcome.
🔥 The 3 Temperature Zones Every Griller Should Know
To gain control over your charcoal grill, always think in zones, not just one flat surface.
1. High-Heat (Direct Zone)
- Coals are stacked right under the grate
- Ideal for searing steaks, burgers, sausages
- Surface temperature: 450–650°F (230–340°C)
2. Medium-Heat (Two-Zone)
- Half the grill has coals, half doesn’t
- You can move food between zones
- Best for chicken, veggies, or thick cuts
3. Low-Heat (Indirect Zone)
- No coals underneath, heat comes from the side
- Great for slow-cooking ribs, smoking, or whole chickens
- Surface temperature: 225–275°F (107–135°C)
💡 Pro tip: When learning how to BBQ on a traditional charcoal grill, mastering zone setup is more important than mastering recipes.
✋ The Hand Test: Your Built-In Thermometer
Old-school grillers don’t always rely on tools—they use their hands.
Hold your hand 4 inches above the grate and count the seconds before you pull away:
| Seconds | Estimated Temp | Heat Level |
|---|---|---|
| 2–3 | 450–650°F | High |
| 4–5 | 350–450°F | Medium |
| 6–7 | 250–350°F | Low |
| 8+ | <250°F | Very Low / Cooling |
⚠️ Don’t burn yourself—use this as a quick guide, not a dare. This technique helps build intuition, a key part of mastering how to BBQ on a traditional charcoal grill.
🌀 How to Control the Heat Like a Master
With no knobs, your only tools are air, fuel, and patience:
🔽 Use Vents Like Volume Knobs
- Bottom vent = oxygen intake (fuel for fire)
- Top vent = smoke and heat exhaust
Need more heat?
- Open both vents fully
- Use dry, fast-burning charcoal
- Add fresh coals to keep temp up
Need less heat?
- Close bottom vent slightly
- Shift coals to one side (indirect cooking)
- Keep lid on to trap heat without flare-ups
🔄 Learn to Rotate and Move
Traditional charcoal grills have hot spots and cool zones—they’re not even. Learn to:
- Rotate steaks or patties halfway through cooking
- Move food from direct to indirect zone to finish cooking slowly
- Lift the lid briefly, not constantly, to keep temperatures stable
💡 Grilling is 30% setup, 70% movement. The fire won’t wait for you—you have to dance with it.
♨️ Watch the Signs of Heat
The grill speaks to you through smoke, sizzle, and scent.
- Fast sizzle + dripping fat = high heat
- Slow sizzle + mild smoke = medium heat
- No sizzle, pale smoke = low heat or dying coals
- Big flames = flare-up, move food immediately!
Use your senses. The more you cook, the more confident you’ll become. You’ll eventually “just know” when it’s time to flip or move food.
🧠 Final Wisdom
Learning how to BBQ on a traditional charcoal grill is not just about cooking—it’s about building an inner compass. Thermometers help, but instinct rules the fire. When you understand heat with your eyes, ears, and hands, you’ll become unstoppable.
7. The Ritual Begins: Step-by-Step BBQ Using a Traditional Charcoal Grill
You’ve got your charcoal. You’ve set your heat zones. You can feel the warmth of the fire, hear the gentle hiss of coals ready to perform. Now, it’s time to begin the ritual—grilling, the old-school way.
If you’ve been wondering exactly how to BBQ on a traditional charcoal grill, this step-by-step guide will take you from raw ingredients to perfectly grilled meals—with confidence and control.
🔧 Step 1: Final Prep Before the Food Hits the Grate
- Oil the grates: Use a paper towel dipped in oil, held with tongs, and rubbed over the hot grate to prevent sticking.
- Double-check the heat zones: Ensure your direct and indirect areas are properly set.
- Have everything close by: Tongs, spatula, basting brush, spray bottle (for flare-ups), and a tray for cooked food.
🧠 Charcoal grilling is fast and intense—don’t leave the grill once cooking starts!
🥩 Step 2: Place the Food Like a Pro
- Start by placing thicker cuts over indirect heat—they take longer and benefit from slow, even cooking.
- Put thinner or quick-sear items over direct heat.
- Leave some space between each item—this helps airflow and consistent cooking.
💡 Pro tip: Keep the lid open briefly while placing food, then close it to retain heat.
🔄 Step 3: Manage the Cook (Flip, Rotate, Shift)
- Flip only once or twice. Constant flipping reduces sear and flavor.
- Rotate items if one side of the grill is hotter.
- Move food from direct to indirect zones as needed—especially if fat drips cause flare-ups.
- For longer cooks, close the lid to trap heat and infuse smoke.
🧠 Learning how to BBQ on a traditional charcoal grill is about feeling the food as much as the fire. Pay attention to sounds and smells.
🌬️ Step 4: Keep the Fire Alive
Your fire needs occasional care:
- Add more charcoal every 30–45 minutes for long sessions
- Light fresh coals in a chimney while you grill (don’t dump unlit charcoal directly)
- Use tongs or a coal rake to rearrange or boost weak heat zones
- Adjust vents if heat drops too low or spikes too high
🌡️ Step 5: Check for Doneness
You can use intuition—or a thermometer if you’re new:
- Steak: 125°F (rare), 135°F (medium-rare), 145°F (medium)
- Chicken: 165°F at the thickest part
- Pork: 145°F with 3-minute rest
- Veggies: Tender with grill marks, not soggy or burnt
💡 If unsure, cut open the thickest part and check—better to be safe, especially with poultry.
🛑 Step 6: Rest the Meat
Once off the grill, let your meat rest 5–10 minutes. This helps:
- Redistribute juices inside the meat
- Maintain tenderness and flavor
- Avoid dryness from cutting too early
🧠 This part is often skipped, but it separates good grillers from great ones.
🧼 Step 7: Post-Grill Ritual
- Brush the grates while they’re still warm
- Close vents to extinguish remaining coals
- Dispose of ash when completely cool
- Wipe down exterior to remove grease or smoke stains
You’ve now completed your first full cycle of how to BBQ on a traditional charcoal grill—from fire to flavor to cleanup.
✅ Bonus: Flowchart for a Smooth BBQ Session
- Light charcoal (chimney method) →
- Set heat zones →
- Oil grates →
- Place food (direct/indirect) →
- Manage fire and food (flip/shift) →
- Check doneness →
- Rest and serve →
- Clean and close
Simple. Ritualistic. Satisfying.
🔥 Closing Thought for This Section
Every cookout is a chance to improve. You’ll burn some things. You’ll forget to flip. You might drop a steak. That’s okay. With each session, you’ll get sharper, faster, calmer—and more intuitive with fire.
And that’s what how to BBQ on a traditional charcoal grill is really all about: learning by doing, growing with every spark.
8. Recipes That Belong to Fire: Old-School Dishes to Master
You’ve got the grill, the fire, and the confidence. Now it’s time to feed the flame—literally. When learning how to BBQ on a traditional charcoal grill, the best way to sharpen your skills is by cooking dishes that truly shine over charcoal.
These recipes aren’t just delicious—they’re designed to teach you heat control, timing, and the magical interaction between smoke and food.
🥩 1. Classic Charcoal-Grilled Ribeye Steak
Why it works:
Ribeye has marbling (fat) that sizzles and flames up just enough to create that iconic smoky crust.
Grill style:
- Direct high heat (sear both sides for 3–4 minutes)
- Finish on indirect heat if thicker than 1 inch
- Rest before slicing
💡 Pro tip: Use only salt, pepper, and a bit of oil—let the charcoal do the flavoring.
🍗 2. Old-School BBQ Chicken (Bone-In, Skin-On)
Why it works:
Chicken over charcoal teaches you patience and zone cooking—it burns easily if rushed.
Grill style:
- Start on indirect heat with lid closed (20–30 mins)
- Move to direct heat for crispy skin (final 5 mins)
- Internal temp: 165°F (check near bone)
Add a simple BBQ glaze in the final 3–5 minutes for caramelization—not before, or it’ll burn.
🌽 3. Charcoal-Roasted Corn on the Cob
Why it works:
Corn absorbs smoke beautifully and teaches you how to cook over low-to-medium heat without overdoing it.
Grill style:
- Soak corn in husk for 30 minutes
- Grill over indirect heat for 20 minutes
- Finish over direct heat for char marks
Add butter, salt, and a squeeze of lime after cooking for that classic street flavor.
🍖 4. Slow-Smoked Ribs (Traditional Dry Rub)
Why it works:
Cooking ribs low and slow trains your ability to maintain temperature, adjust vents, and use indirect heat effectively.
Grill style:
- Indirect heat, lid closed
- Add soaked wood chips for smoke
- Cook for 3–4 hours at 250°F
- Wrap in foil after 2 hours for tenderness
Use a rub with paprika, garlic, pepper, and brown sugar—sauce optional!
🥓 5. Grilled Lamb Chops with Rosemary Smoke
Why it works:
Lamb pairs beautifully with herbal smoke—this recipe lets you experiment with wood chips like rosemary or mesquite.
Grill style:
- Direct heat (3–4 minutes per side)
- Add rosemary twigs to the coals during cooking
- Let rest with foil tent for 5 minutes
Perfect for learning how to BBQ on a traditional charcoal grill with added aromatics.
🧀 6. Grilled Halloumi and Veggie Skewers
Why it works:
Great for vegetarian BBQ fans, and excellent for practicing timing on medium heat zones.
Grill style:
- Use two-zone method
- Rotate frequently to avoid burning
- Olive oil + lemon marinade before grilling
Try bell peppers, zucchini, red onion, and mushrooms for colorful skewers.
🐟 7. Whole Charcoal-Grilled Fish (Tilapia or Snapper)
Why it works:
Whole fish teaches you precision heat control and how to handle fragile foods over a grill.
Grill style:
- Medium indirect heat with oiled grate
- Stuff fish with lemon, garlic, herbs
- Grill 7–8 minutes per side
- Use a wide spatula for flipping
Fish skin crisps up beautifully while smoke infuses the flesh—an underrated BBQ dish!
🧄 8. Smoky Charcoal-Roasted Garlic & Potatoes
Why it works:
A great side dish for testing how long you can hold consistent indirect heat over time.
Grill style:
- Wrap garlic bulbs and potato wedges in foil
- Place on cooler side of grill
- Cook for 30–40 minutes
- Finish unwrapped over direct heat for crisping
Add olive oil and sea salt before wrapping. The result? Smoky, creamy, earthy goodness.
🔥 Final Tip: Trust the Fire
Each of these recipes will teach you something new: timing, fire adjustment, lid management, flipping technique, or flavor layering.
By cooking them over and over, you don’t just feed others—you build your skills with how to BBQ on a traditional charcoal grill.
Before long, you won’t need recipes—you’ll just listen to the sizzle and smell the smoke.
9. What Could Go Wrong? And How You Fix It Like a Seasoned Griller
Let’s be honest: when you’re learning how to BBQ on a traditional charcoal grill, things don’t always go as planned.
fire dies mid-cook. chicken’s burnt on the outside but raw inside. The steak sticks, flares up, or ends up dry.
It happens. Even seasoned grillers make mistakes. What separates pros from amateurs is not avoiding problems—but knowing how to fix them.
Here are the most common pitfalls—and how to solve them like a BBQ master.
🔥 Problem #1: The Fire Won’t Start
Why it happens:
- Damp charcoal
- Poor airflow
- No chimney or starter
- Using too much paper (chokes air) or too little
Fix it like a pro:
- Use a chimney starter every time—it’s almost foolproof
- Ensure bottom vent is fully open
- Use dry, quality charcoal, not leftovers from a humid garage
- Try natural fire starters instead of newspaper if needed
💡 Never resort to lighter fluid—once you learn how to BBQ on a traditional charcoal grill, chemical taste is the enemy of flavor.
🌬️ Problem #2: Your Coals Die Too Fast
Why it happens:
- Not enough charcoal
- Vents too closed
- Wind blowing out the fire
- Wet or smothered coals
Fix it like a pro:
- Start with enough coals—especially for long cooks
- Keep vents slightly open to maintain oxygen flow
- Build a wind block (aluminum foil or adjust grill position)
- Keep a small chimney load ready to refresh your fire
🔥 Problem #3: Grill Gets Too Hot, Too Fast
Why it happens:
- Overloading coals
- Leaving all vents wide open
- Lid closed too long while flames rise
Fix it like a pro:
- Close bottom vent halfway, then check again after 5 minutes
- Move food to the indirect zone quickly to avoid burning
- Remove some coals if necessary (use tongs and a metal tray)
💡 Control the fire—don’t let it control you. That’s a core skill in learning how to BBQ on a traditional charcoal grill.
🥩 Problem #4: Meat Is Burnt Outside, Raw Inside
Why it happens:
- Cooking thick cuts over direct high heat
- Fire too close to grate
- No indirect zone
Fix it like a pro:
- Always use a two-zone setup
- Sear first, then move to indirect heat to finish cooking gently
- Use the lid to trap heat for even cooking
🧼 Problem #5: Food Sticks to the Grate
Why it happens:
- Grate wasn’t preheated
- Didn’t oil the grate
- Tried to flip too early
Fix it like a pro:
- Always preheat and oil your grill grate
- Let meat cook until natural sear releases it from the metal
- Use long tongs, not force
💨 Problem #6: Out-of-Control Flare-Ups
Why it happens:
- Fat dripping directly onto hot coals
- No indirect zone to move food
- Lid off too long
Fix it like a pro:
- Keep a cool zone as a safe area
- Move food away from flare-up quickly
- Keep a spray bottle of water handy (use lightly, don’t flood coals)
- Close the lid—less oxygen = fire dies faster
❄️ Problem #7: Uneven Cooking or Cold Spots
Why it happens:
- Coals not spread properly
- One side of the grill burns hotter
- Grate slanted or uneven
Fix it like a pro:
- Learn to arrange your coals evenly or create proper heat zones
- Rotate food halfway through the cook
- Shim the grill legs or surface to keep level
🔁 Problem #8: You Keep Opening the Lid Too Much
Why it matters:
- Every time you open the lid, you lose heat and smoke
- Heat drops fast with charcoal
- Can ruin long cooks like ribs or chicken
Fix it like a pro:
- Trust the process—check less, cook more
- Use a meat thermometer if unsure about doneness
- Plan and set timers—discipline is key in old-school grilling
🧠 Final Insight: Mistakes Are Lessons in Disguise
Every flare-up, every burnt burger, every slow-starting fire teaches you something. No pitmaster was born with smoke on their hands—it’s a skill forged in trial, error, and fire.
By tackling these issues head-on, you become more confident and skilled. You start to sense problems before they happen, adjust instinctively, and move like a veteran around the flames.
That’s what makes you a true master of how to BBQ on a traditional charcoal grill.
10. Cleaning and Maintenance: Respecting Your Grill for the Long Run
Learning how to BBQ on a traditional charcoal grill isn’t just about lighting coals and flipping steaks—it’s also about respect. Respect for the fire. Respect for the food. And especially, respect for your grill.
A clean and well-maintained charcoal grill lasts longer, cooks better, and gives you more reliable results. It’s your battlefield, and every great warrior keeps their weapon in top shape.
Here’s how to care for your charcoal grill—before, during, and after your BBQ sessions.
🧹 Step 1: Clean After Every Cook (Don’t Wait!)
Why it matters:
- Old food particles cause sticking and bad smells
- Grease buildup can lead to flare-ups
- Ashes trap moisture and promote rust
Right after cooking (while the grill is still warm):
- Use a wire grill brush or a ball of aluminum foil with tongs
- Scrub the cooking grates to remove burnt-on bits
- Close the lid and vents afterward to suffocate the fire
💡 Pro tip: Cleaning while hot is 10× easier than trying it cold the next day.
🗑️ Step 2: Dispose of Ash Properly
Why it matters:
Ash holds moisture—if left in the grill, it promotes rust and corrosion.
How to do it:
- Wait at least 12 hours after cooking for ashes to fully cool
- Use a metal scoop or dustpan to remove ashes
- Dispose of ashes in a metal container, not plastic
- Consider using ash for compost if you’re using natural charcoal (no additives)
If your grill has an ash catcher or tray, empty it after every few uses to prevent clogging.
🛠️ Step 3: Deep Clean Regularly (Every 5–10 Uses)
Just like a car, your grill needs a deeper clean once in a while.
Here’s how to deep clean:
- Remove all grates and soak in warm soapy water
- Scrape out the fire bowl and any built-up grease
- Clean vents and air holes to ensure proper airflow
- Wipe down the lid interior—the black stuff is carbon, not flavor
- Let all parts dry completely before reassembling
💡 Optional: Use vinegar and baking soda for eco-friendly deep cleaning.
🧴 Step 4: Protect It from the Elements
Even if you’ve mastered how to BBQ on a traditional charcoal grill, weather is your grill’s worst enemy.
To protect your investment:
- Always cover your grill with a weather-resistant cover
- Store it in a dry, shaded area—especially during rainy seasons
- Avoid grilling in extreme wind or rain (for safety and grill longevity)
If you grill often in humid areas, consider coating metal surfaces lightly with vegetable oil to prevent rust.
🧰 Step 5: Inspect and Maintain Moving Parts
Every few months, do a quick check of these components:
- Lid hinge: Rust or resistance? Apply light oil
- Air vents: Blocked or jammed? Clear them with a brush
- Grill legs or wheels: Wobbly? Tighten with a wrench
- Handles and thermometers: Check for cracks or looseness
💡 If something breaks, replace it. Don’t let one faulty piece ruin your cookout.
📅 Step 6: Seasonal Storage (If Not Used Often)
If you’re taking a grilling break for winter or travel:
- Do a final deep clean
- Coat grates lightly with oil
- Empty all ash and moisture
- Store in a dry indoor spot or under a thick, waterproof cover
🔥 Treat Your Grill Like a Partner
Your traditional charcoal grill is not disposable—it’s a long-term partner in smoke and flavor. The more you care for it, the more consistently it will perform.
Knowing how to BBQ on a traditional charcoal grill means knowing that fire and metal are alive. They respond to how you treat them. And when you show respect, your grill rewards you with better results, year after year.
11. Why Traditional Still Wins: The Timeless Appeal of Charcoal BBQ
In a world filled with high-tech gas grills, electric smokers, and smart BBQ apps, why do so many still return to the old ways?
Because when it comes to flavor, experience, and authenticity, nothing beats the power of fire and coal.
When you truly understand how to BBQ on a traditional charcoal grill, you realize it’s not just a way to cook—it’s a return to something real.
🔥 1. The Flavor is Unmatched
Charcoal delivers a distinct, smoky depth of flavor that gas grills simply can’t replicate. The aroma of searing meat over real embers, the subtle char, and the kiss of smoke from wood chips—this is what makes charcoal BBQ legendary.
Whether it’s juicy ribs or a simple grilled corn, traditional charcoal cooking transforms ordinary into unforgettable.
🕰️ 2. It Slows You Down—in the Best Way
Modern life moves fast. Too fast. But grilling over charcoal demands patience, presence, and participation.
When you learn how to BBQ on a traditional charcoal grill, you’re not just multitasking—you’re fully there. Tending the fire. Smelling the smoke. Listening to the sizzle. It becomes meditative, even therapeutic.
🔧 3. It Teaches Skill, Not Just Convenience
Gas grills are convenient—but they don’t teach you much. With charcoal, you learn heat control, airflow management, and timing through experience. Every BBQ becomes a lesson, and every mistake helps you grow.
Eventually, you gain a sixth sense for grilling. You stop checking apps and thermometers. You trust your hands, eyes, and instincts.
That’s the true mastery of how to BBQ on a traditional charcoal grill.
🌍 4. It Connects You to Cultures Around the World
Charcoal grilling is universal. From Japanese Yakitori, Argentine Asado, to Middle Eastern Kebabs, and Indonesian Sate—charcoal fire has long been the soul of global BBQ traditions.
When you grill with charcoal, you’re tapping into a centuries-old, global heritage. You’re part of something bigger than a backyard party—you’re continuing a legacy.
📸 5. The Experience is More Social and Authentic
There’s something magical about gathering around a fire. People lean in closer. Conversations slow down. Laughter fills the smoke-scented air.
Charcoal BBQ brings people together—not just to eat, but to experience something tactile, primal, and memorable. It’s not just cooking—it’s creating moments.
💰 6. It’s Affordable and Accessible
You don’t need a $2,000 stainless-steel gas grill to get started. A solid charcoal grill, some quality briquettes or lump charcoal, and a chimney starter—and you’re ready to go.
Learning how to BBQ on a traditional charcoal grill is one of the most affordable ways to become a BBQ expert, no fancy tech required.
🔥 7. It Keeps the Fire in Grilling Alive
Let’s face it—pressing a button to start a grill just doesn’t feel the same. With charcoal, you light the fire yourself. You nurture it. You build it up and work with it.
That fire? It’s alive. And it reminds us that cooking is still an art, not just a process.
🧠 Final Reflection: Back to the Roots
In a time when everything is automated, pre-programmed, and screen-based, charcoal grilling reminds us of something essential: we are meant to engage with the fire.
Mastering how to BBQ on a traditional charcoal grill is about flavor, yes. But it’s also about feeling. And the feelings it brings—joy, patience, pride, connection—are timeless.
12. Your Traditional BBQ Journey Starts Now: Final Thoughts and Pro Tips
You’ve made it through the smoke, the fire, the heat zones, the flare-ups—and the flavor. By now, you understand the tools, techniques, and mindset required to truly learn how to BBQ on a traditional charcoal grill.
But this isn’t the end. This is the beginning of your journey as a confident, capable, and authentic charcoal griller.
🎯 What You’ve Learned So Far
- How to set up and light a charcoal fire like a pro
- How to manage heat and airflow with precision
- How to cook with control, using both direct and indirect zones
- How to choose recipes that teach skill, not just fill your plate
- How to troubleshoot common problems without panic
- How to clean and maintain your grill for years of greatness
- Why traditional charcoal grilling still wins, even in a digital world
You’ve gone beyond the basics—you now have a full roadmap to becoming a grill master rooted in time-honored tradition.
🔝 Pro Tips to Keep Progressing
- Keep a Grill Journal
Note what worked, what didn’t, what you cooked, and how it turned out. You’ll improve faster than you think. - Experiment with Wood Flavors
Add hickory, mesquite, cherry, or apple wood chips for subtle differences in taste. - Invest in a Quality Thermometer (for now)
It’ll help you gain confidence while your instincts develop. - Upgrade Your Fuel
Use natural lump charcoal or premium coconut shell briquettes for hotter, longer burns and less ash. - Cook for Others Often
BBQ is best when shared. The more you cook for friends and family, the more pressure turns into pride—and experience. - Respect the Fire
Always treat your grill with caution and your fire with care. A master never grows careless.
🔥 Final Words: From Beginner to Pitmaster
Grilling with charcoal isn’t just a cooking method—it’s a personal evolution.
At first, it may seem slow, messy, unpredictable. But keep at it. Fire teaches discipline. Smoke teaches patience. Heat teaches focus.
Over time, you’ll come to love every step: the sound of the flame, the feel of the grate, the smell of smoke in your shirt, and the silence that follows the first bite of something cooked perfectly over coals.
And that’s the real reward of learning how to BBQ on a traditional charcoal grill—not just the food, but the connection to something deeper.
👣 Ready to Start?
Grab your charcoal. Set up your grill. Light your fire.
You don’t need permission, or perfection—you just need to start.
Because your traditional BBQ journey doesn’t begin when you’re an expert.
It begins the first time you choose fire over convenience, flavor over speed, and tradition over trend.
Welcome to the tribe of true charcoal grillers. Now go make it smoky.